
I get a lot of questions about painting miniatures, specifically about things that new miniatures painters can do to improve the quality of their paint jobs. In my opinion there are three really important things that you can do to help yourself out. These are (in no particular order), brush control – which comes with practice, learning to thin your paints, and painting from a wet palette. Of these three I think using a wet palette is something any painter can do that is low cost and will have an immediate and significant impact on the quality of their miniature painting. Today I’m going to talk about wet palettes.
(Before we dive in I want to be clear that we’re talking about using water based acrylic paints here like Vallejo, Games Workshop, Reaper, etc)
Just What Is a Wet Palette and Why Do I Need it to Paint Miniatures?
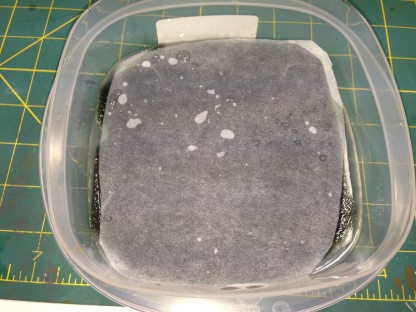
The wet palette in all of its simple, inexpensive yet supremely helpful glory
The default for most new miniature painters is to use a brush to get paint straight from the pot and to slather it on to your miniatures. This leaves a less than desirable finish as you tend to get the paint on very thick and it obscures some details. There are a lot of things wrong with this approach and I don’t want to get sidetracked so I’ll just say “don’t do that” in this article and leave it at that for now. We’ll revisit that topic in another post in the near future.
Some miniature painters may know not to dip brushes straight into the pot or they may be using paint that’s in dropper bottles so they’re using some sort of palette. Maybe one of these plastic ones or a piece of ceramic tile or even an old salad plate. This is a step in the right direction but you can do better. You can use what’s called a wet palette.
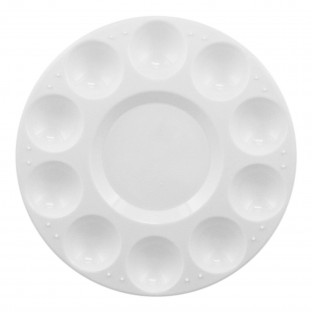
This is a pretty typical multi well plastic palette. You should keep one around for special applications that you don’t want on a wet palette, like washes.
A wet palette is exactly what it sounds like, a surface to load and mix paints on but the difference is that it’s actually wet. This is accomplished by having a container with a sponge on the bottom that’s loaded with water and some paper on top of the sponge. This can be either special wet palette paper or some stuff you probably have around the house – more on that in a minute.
Using wet palettes will give you several key advantages. First of all when you load paint on to the wet palette it immediately sucks up a little water through the paper and thins out the paint. You’ll have a base to start from and then can experiment with the paints you’re using to find the right consistency. In some cases you won’t need to thin it any further, but this varies by manufacturer and even by color within a brand of paint.
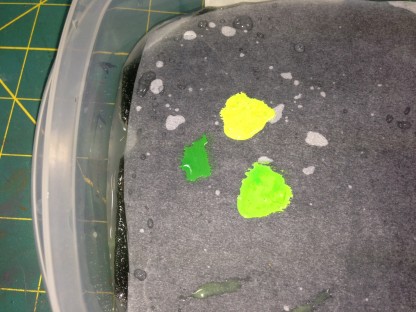
A few dabs of water based acrylic paint on the wet palette. Note how it’s starting to spread a little as it picks up a bit of water – this is good!
Since your paints are now resting on a layer of moisture they will stay wet much longer than if you’d just loaded them onto a regular dry palette. This also means that you can leave paint on the wet palette, close it up and come back a few days later and your paint will still be wet and useable. (If you leave it there long enough it will separate some so you’ll need to give it a stir to rejuvenate it). An added bonus is that if your paint is in open pots they’ll last longer because you’re only opening the pots long enough to get some paint out. There is less exposure to air and less evaporation of the moisture in the paint pot thereby extending the life of your paint in the pots.
Using a wet palette also means you can combine paint colors side by side to get different gradients and blends when you’re shading. Also, if you’ve mixed up or blended a custom color you’ll be able to preserve that between painting sessions as it will stay wet when stored in the wet palette saving you time and the headache of remembering just what you did to arrive at that color you mixed up.
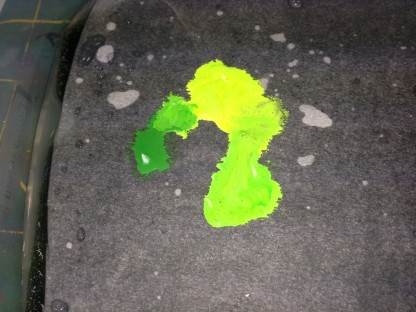
This is just a quick (and sloppy) example of blending paint on your wet palette and it’s not completely blended together so you can get the idea of what I’m doing here… You can see how you can work up different color gradients easily this way
Where Do I Get a Wet Palette?
You can buy a complete wet palette that’s an airtight container, sponge and special paper for around $10 to $20. There are these Masterson Sta–Wet palettes which run around $10 or so at art stores like Michael’s, Hobby Lobby, etc. Or you can get one of these Privateer Press P3 Wet Palettes for around $20 at your FLGS or shipped right to your door from Amazon if you don’t have a local game store.
The P3 Wet Palette, usually under $20 and perfect if you don’t want to build one yourself.
If you’re on a budget or like to do stuff yourself you can easily build a wet palette, probably with stuff you already have around the house.
How Can I Build My Own Wet Palette?
This is actually a pretty simple project that you can do in less than an hour. You’ll need to assemble the following items:
Airtight container – Tupperware, Glad or Rubbermaid containers. This can be glass or plastic, whatever you have as long as it’s got a good seal. Use a size that you’re comfortable with and have room for on your work surface. I use a sandwich sized box for my wet palette.
Sponge or some foam – You can use a sponge or even some of the foam that comes in miniatures blister packs packages. You want to cut this into the shape of your container so that it’s an even layer across the bottom. If you don’t have a sponge you can also use paper towels. Use a couple and fold them up so they fit in your container. Trim as needed. (Here’s a link to some purpose made Masterson Sponges)
Parchment paper – If you don’t know what this is, ask your wife or s/o (or mom). It’s also called baking paper. This is different from wax paper. (You can use wax paper in a pinch but I don’t recommend it. Parchment paper just has different properties for passing moisture through it and is significantly better for this application) If you don’t have any parchment paper look in the grocery store section where they sell plastic wrap and aluminum foil, you’ll find it there and it costs around $3 for a box that will last you a LONG time.
Water – this can be tap water but if your water is hard/has high mineral content then use some distilled water. Bonus: you need to wash the sponge and change the water occasionally, using distilled will keep the water from getting funky longer and is better in your paints anyway.
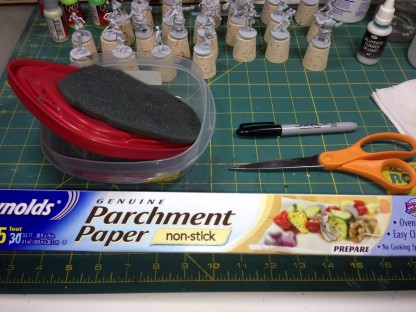
This is all you need to make a wet palette. An airtight container, a sponge or foam, some parchment paper and some water. Simple and cheap!
Here’s how you make your wet palette. Dampen your sponge. This is because if you use a dry sponge it will swell when you wet it and expand. Just run water on it and then wring it out so it’s the size it will be when wet. Turn your container upside down and lay it on your sponge so you can trace around it (assuming you’re using a sponge or foam that’s larger than your container). Trace around and then cut out your sponge or foam – cut inside the lines of the dimensions of your container, this doesn’t have to be perfect but it should be reasonably close.
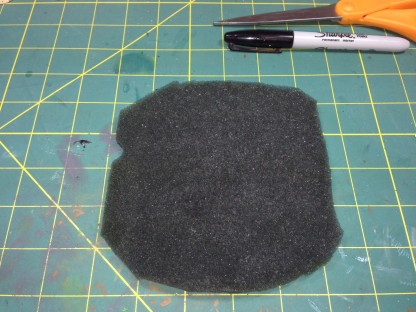
I used a piece of foam from some packaging or an old miniatures case. You can use a sponge or even folded layers of paper towels for your wet palette
Next tear off a half dozen or so pieces of parchment paper that will fit in your container. It’ll probably be twice as long as your container if you’re using something like a sandwich sized box. If that’s the case just fold it over so you have a pad of parchment paper. When you cut it to fit the shape of your container make sure you cut the folded part off so all the sheets are loose. Lay your container on the stack of paper and trace it. Cut the paper along the inside of the line you traced so it fits in the container nicely. You will now have enough pre-cut parchment paper to last you awhile.
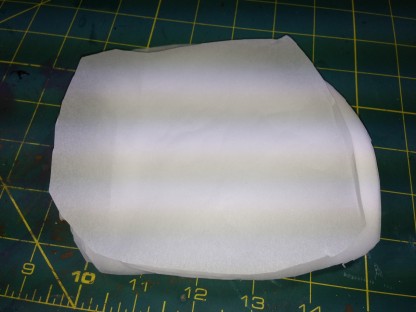
Here’s the parchment paper cut out roughly in the shape of my container. It doesn’t have to be exact. Trim so it lies flat on the sponge.
Next up put the sponge in the container, and fill it with water to the top of the sponge. Lay a sheet of the parchment paper right on the sponge and it will absorb some of the water but reach a sort of equilibrium where it’s wet but doesn’t disintegrate or pass a lot of water through. This is the surface that you’ll load with paint and dip your brush into when loading it.
One last trick here – you can actually store few sheets of the pre-cut parchment paper under the sponge so that they are pre-wet when you’re in the middle of a painting session and need to change the parchment out because you’ve used it up.
A Wet Palette Will Help You Become a Better Miniature Painter

Good miniature painting is something that takes trial and error and lots of practice. Using a wet palette isn’t a shortcut but it is one of the few things that will be a total game changer for you and your painting. It’s also something that really delivers a lot of bang for your buck. When someone asks me how they can improve the first thing I ask them in return is “are you using a wet palette?”. If they’re not then this is always my first recommendation and invariably people get immediate, positive results.
As always, feel free to leave a comment below, I’d like to hear from you an appreciate constructive discussion.