In a previous post about airbrush accessories, one of the items I recommended for someone getting into airbrushing miniatures and models is the addition of an airbrush spray booth to control paint odor and overspray. You can build a spray booth yourself or go the ready made route with one of these handy portable airbrush spray booths you can find on Amazon. These airbrush spray booths are convenient and well suited to a small work space. The portability is also handy if you’re not able to keep it set up all the time as it folds up to about the size of a small carry-around tool box.
One thing that bothers me about these spray booths is that, as an older gamer who’s eyesight is not what it used to be, I like lots of light when I’m painting. It can be a bit of juggling act to get light where I need it in the spray booth. I noticed awhile back that some of these booths now come with an internal light of some sort so I figure I must not be the only person who feels that way. After messing around with various swing arm lamps and stick on lights I finally decided to look for a better solution and I believe I’ve found one with LED strip lights.
Early on, I decided that I wanted this airbrush spray booth lighting mod to be as easy as possible, so that meant I didn’t want to have to take the entire spray booth apart or rewire or solder anything unless absolutely necessary. The goal was to do the mod and not have it require a person to learn a whole other set of skills including electrical engineering just to get some lights installed. What I’ve come up with meets that goal and provides a great lighting solution for those folks who already have one of these portable airbrush booths that didn’t come with pre-installed lighting.
The LED Airbrush Spray Booth LED Light Mod Parts List
Before we get started you’ll need to round up a few things. For the parts you need to buy, I’ve included Amazon links for convenience. You’ll need the following:
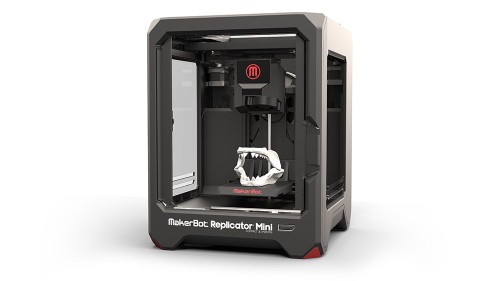
Your Airbrush Spray Booth
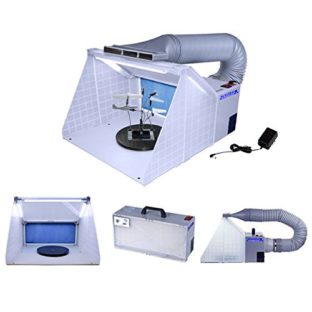
The Master Airbrush Spray Booth
A 12 Volt Flexible LED Strip Lights Kit – I recommend you choose a set of lights that are in the 6000K Daylight range for painting. If you’re not sure what a “Daylight” bulb is, go ahead and check out this post I wrote awhile back on lighting so you’ll understand why I’m recommending that. This kit has a spool of LED lights on a flexible adhesive tape and some stuff like connectors, a power adapter and some optional items like a remote control, etc. You won’t use everything in the kit for this project and you’ll have LED tape left over for another project like under cabinet lighting or modding something else. (I used my extra LEDs for some under cabinet lighting and scored some points with Mrs. HCIL)
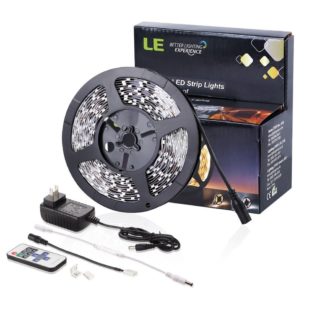
This LED light kit and a few other items is perfect for adding bright lights to your airbrush spray booth
A four way DC jack splitter – I used a four way to get four strips of LEDs in my airbrush spray booth because I like lots of light where I’m working. You could go with a two or three way splitter, whatever you think will be adequate for your needs.
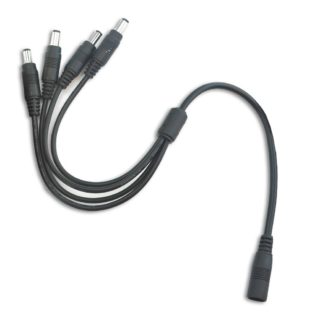
You’ll need a splitter cable with enough leads to give you plenty of connections for all of your LED light strips. I used a four way splitter but these come in many varieties
Several two pin quick connector to DC female adapter cables – you’ll need several of these, one for each strip of lights you’re installing. The LED light kit includes one. I bought a 10 pack of these because I knew I was going to use the rest of my LED light strip eventually.
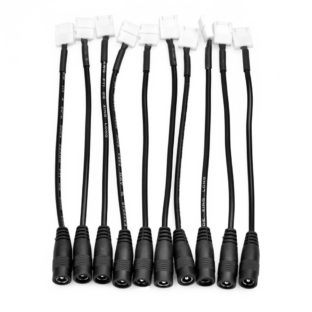
You’ll need one of these quick connectors for each LED light strip. Buy some extras because you’ll have a lot of LED tape left over after this project.
An on/off switch with DC male and female connectors – The LED kit comes with a wireless
RF receiver and a multi-function remote but I knew I wasn’t going to use this for the airbrush spray booth mod. I did use these parts for the under counter lighting. (The remote does all kinds of stuff like dimming and pulsing the lights etc., a bit of overkill unless you’re planning a disco spray booth).
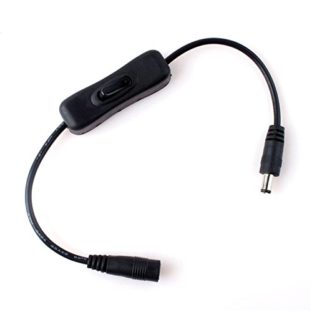
A simple toggle switch for your LED powered airbrush spraybooth
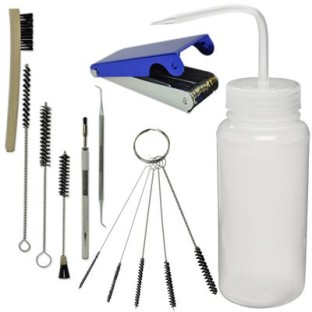
As far as tools go this was pretty simple. I used a tape measure, a pair of good scissors (the LED light tape has a metal backing so you’ll need a sharp pair of scissors to cut that), and something you can use to help line the LED light tape up in the connectors, I used a hook end sculpting tool. Lastly if you’re going to pass the wires through the wall of the spray booth you’ll need something to drill a hole about the size of a nickel for your pass-through. I used a flat wood boring bit because this was what I had handy, but you could use a Dremel or a hole saw if you have one.
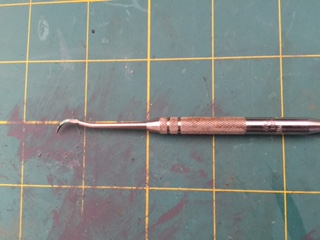
The hook ended sculpting tool that I used to help line up the LED tape with the connectors
Installing The LED Lights In Your Airbrush Spray Booth
This was pretty straightforward. First, wipe down the surface that you’re going to stick the LED light strips to. This needs to be clean and dry so that you get a good bond. Next measure to see how long the surface is that you’re going to stick the LEDs to. The LED tape has scissor marks on it that show you where it is safe to cut. As long as you cut it at the marked spots all of your lights will work, however if you cut the tape at an unmarked spot you’ll break the continuity and some of your lights won’t work. The LED tape safe cutting marks probably won’t be the exact length you want it to be but it will be pretty close and throw enough light to prevent any issues. Make your cuts cleanly and straight across the LED tape.
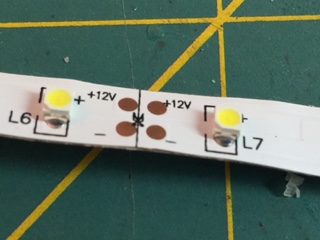
The cut marks on the LED light tape. Cut the tape in these marked spots to avoid any conductivity issues with your light strips.
Next take one of your quick connectors and open it up. You’ll see that the tape actually slides under the plastic connector at the edges and then slides under the metal contact points. The exposed copper dots on the LED tape will be right under the contact points in the quick connector when the LED tape is properly inserted. Getting the tape under the metal contacts is a bit tricky as everything is a snug fit.
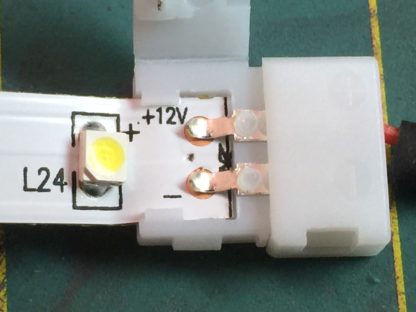
The LED tape inserted into the quick connector. Note how the connector has tabs to hold the LED tape in place straight. You want the tape to be all the way in so the metal contacts on the connector are resting on the contact dots on the tape.
This was where I used the hook ended sculpting tool to gently grab the LED tape and pull it into position. You can also lift up the contact points a little bit but go easy and don’t go crazy with torquing them up. Once the tape is firmly in place, close the connector and make sure it’s snapped securely shut. You can see the locking tab in place on the side when it’s correctly closed.
Plug your newly made LED strip in and test it to make sure it works and all the lights come on. Test each strip after you’ve made it up. This is the time to test your LED lights and solve any problems, not after you’ve stuck the tape down to the spray booth. The LED tape sticks really well to a clean surface so you won’t want to have to peel it up once it’s in place.
Once you have the required number of strips made up, it’s time to stick them down. You can be very precise with this or just eyeball it. I’ll be honest, with four bright LED strips I just eyeballed it and wasn’t too fussy with it. I also waited until I had the tape stuck down before drilling my pass through hole for the wiring harness. Once I drilled the hole and arranged the wires I used some tape to stick them down and keep any stress off the connectors. For the purposes of this demonstration I used clear packing tape so you could see what I’ve done. I’ll be replacing this with gaffers tape. Once I had the tape in place I connected the on/off switch between the four way splitter and the wall adapter and was good to go. The lights function independently of the spray booth fan so I can have them off when I don’t need them in daylight.
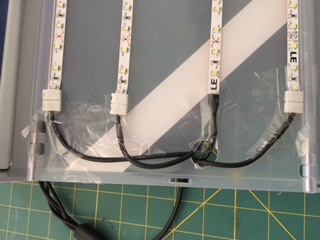
The LED light strips attached and the connectors taped down. You can also see the pass-through hole that I cut in the spray booth for the wires
Airbrush Spray Booth LED Light Mod – Light On!
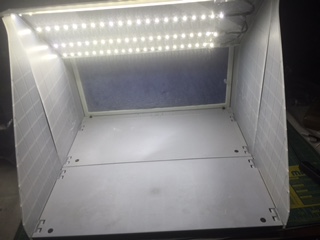
The fully lit airbrush spray booth with the LED light strips installed and powered on
As you can see, this is actually a pretty easy mod and it does not require any knowledge of wiring or soldering. The result is that the interior of the airbrush spray booth is flooded with very bright, very clean light that’s great for painting. Additionally you’ll have some LED stuff left over that you can use on another spray booth (you could easily split this kit with a friend or three) or even on some models or scenery.
Have a comment or question about this post? Feel free to leave it below!