The last couple of posts here have been about not spending absurd amounts of money on your basic tools for assembling and finishing miniatures and model kits. If you read “How To Save $100 On Hobby Tools” then you’ll recall that I mentioned I’d recommend some other tools beyond the basics that you’ll probably want to add to your hobbying tool box with some of the money you’ve saved. Today we’ll take a look at a few items that I think are good choices for expanding your hobby tool set.
The following items are things that I use on a regular basis and are the tools I’ve come to rely on after a couple of decades of building miniatures and models. While there are a couple of essentials, you probably don’t need to run out and buy all of this stuff at once. I’ll offer up some suggestions and provide links to where you can purchase those items, usually on Amazon for convenience sake and because lots of items there ship free or free with an Amazon Prime membership.
Self Healing Cutting Mat
This particular item is pretty much your first additional must have. It’ll keep your work area from getting damaged by your tools, paint and glue. This is especially important if your work area happens to be your wifes (or moms) dining room table. Get a self healing cutting mat and get the largest one you can reasonably use (and afford) for the space you’re usually working in. Measure! I use an 18” X 24” mat which generally gives me a lot of room. I also have a small one that’s about 6” X “10” or so that I can throw in a bag if I’m putting together a little travel tool kit for a demo or a group build at my local FLGS.
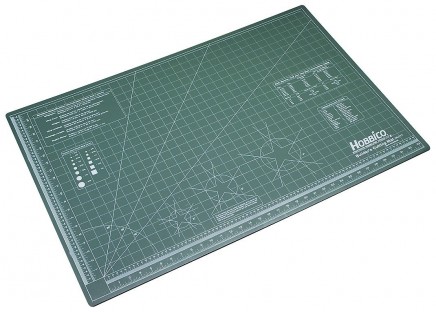
Set yourself up with a cutting mat – particularly if your work area is the dining room table!
Let There Be Light
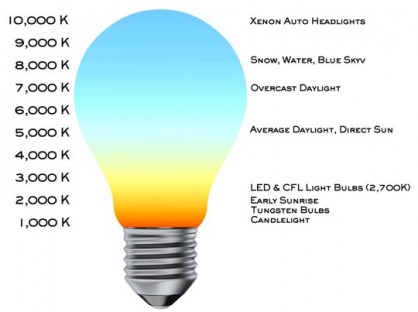
The next item you’re going to want is a good light over your work space. These days Ott Lights seem to be all the rage but I personally don’t care for them other than the fact that they’re compact and somewhat portable. I use a pair of swing arm desk lamps with daylight bulbs that I got from Ikea a few years ago, unfortunately those are no longer available so I can’t recommend the exact ones I have. If you have an Ikea nearby, it’s worth braving the crowds there to check out their selection of desk and office lighting as they have a large variety of stuff. (It’s also a great place to find a workbench/desk and shelving or display cases for your hobby/game room.) Another lamp that is very popular with miniature painters is the LSF 150 but these also seem to be somewhat scarce. A friend of mine uses this Daylight Triple Bright Lamp and has been very satisfied with it. It’s available at Amazon but it’s a bit pricey. It does however, ship for free.

The Daylight Triple Bright Swing Arm Lamp
Another alternative is a lamp with a built-in magnifier. These are pretty easy to find and Harbor Freight Tools even carries one. These come in both fluorescent and LED styles. If you buy fluorescent, you’ll want to replace the supplied bulb with a daylight bulb. Unfortunately I can’t speak much on whether or not the LED lamps are a good fit for this kind of work as I don’t own one and haven’t worked with one either. Whatever you decide, I recommend getting a lamp with a long swing arm that clamps to the edge of your desk if possible. This will give you a lot of freedom to position the lamp head where you need it and can save valuable real estate on your workspace, particularly if it’s a small area to begin with.
One last tip, check your local Staples/Office Depot type office supply store, they typically have a good assortment of lamps that you can check out before you order one online. You may also get lucky and find a sale/markdown item that’s just right!
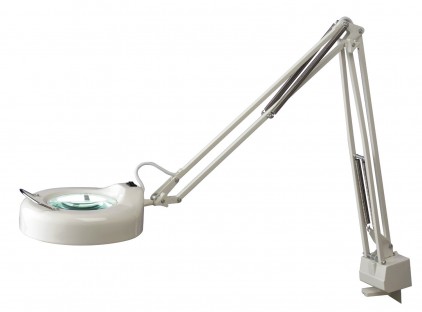
Typical swing arm Fluorescent Lamp with desk clamp – Make sure you get a daylight bulb for this.
A Clear View
This next item is optional and also somewhat dependent on you and your lighting choice and work situation. If you’re an older gamer/hobbyist you’ve probably noticed that those tiny details are probably getting a bit harder to see. I find myself getting a lot more squinty these days so I’ve had to look for some solutions. I was using a set of cheapo drugstore magnifiers/reading glasses and then stumbled across the Donegan OptiVISOR. This is a magnifying visor with an adjustable headband that you can wear over your prescription glasses if need be. The lenses are replaceable and you can buy several different sizes of magnification. These take a little getting used to but once you have them fitted correctly you hardly notice they are there and the visor part moves independently of the headband so they can be flipped up out of the way if necessary.
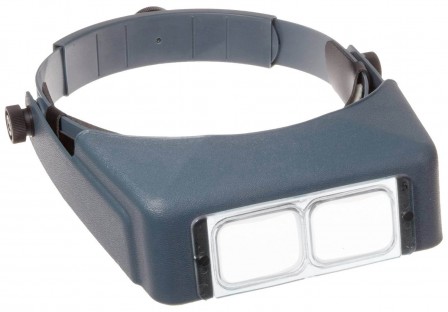
Donegan OptiiVISOR with replaceable lenses
There’s also an accessory for the OptiVISOR that I really like. It’s an LED light kit that attaches to the lens plate and has 6 bright white LEDs that really throw some spot illumination on your subject for those times you need to see some up close detail. This accessory comes with everything you need to mount it and it only takes about 5 minutes to install. It’s powered by double A batteries which are easily replaceable. Once you’ve installed this you don’t notice that it’s even there, until you need it. This gives you portable light when and where you need it and can easily be throw into a travel tool kit if you need to.

The OptiVISOR LED Light Attachment
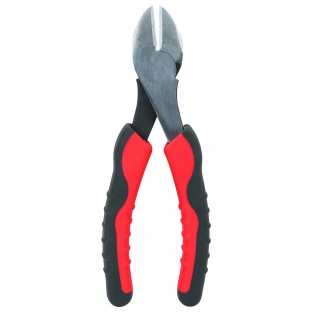
Razor Saw
Another tool I like to have around is a Precision Razor Saw. Some of the tasks you’ll use this for will be cutting parts off of thick resin sprues, cutting molded bases off of miniatures or customizing and kitbashing models. These aren’t too expensive and if you purchased a knife set with a large handle you can just buy these X-Acto blades separately. If you’re going to be sawing wood or plastic for terrain construction or kitbashing, consider adding a mini miter box to go with your saw.
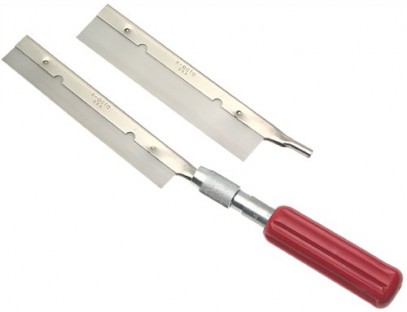
X-Acto Razor Saw Set
Motoring Along
You may be considering adding a Dremel type tool to your kit and I think that can be a handy tool. Keep in mind that those things run at high speeds and can quickly damage what you’re working on or get away from you. For that reason I really like the Dremel MiniMite. The MiniMite is a cordless version of the Dremel that fits well in your hand and runs at a slower speed, making it easier to control. It’s also portable and rechargeable. It accepts all of the usual Dremel rotary tool accessories as far as I’m aware. The best part? It’s only about twenty five bucks on Amazon and ships for free.
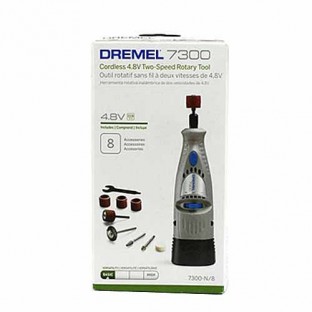
Dremel 7300- N8 MiniMite Cordless Rotary Tool
If you think you’d like a larger, more powerful, yet still portable tool, check out the Dremel 7700 Cordless Moto Tool. The Dremel 7700 does cost about twice as much as the MiniMite though. You’ll want to accessorize your Dremel with some attachments so check out a couple of the accessory kits, I have this 160 Piece Dremel Accessory Set which covers pretty much any eventuality.
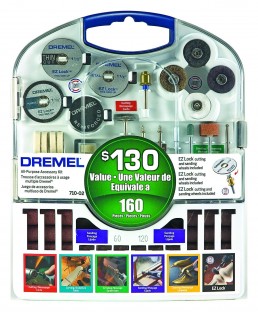
This Dremel 160 piece accessory set probably covers every task you’re going to want to do with a moto tool
Hold On!
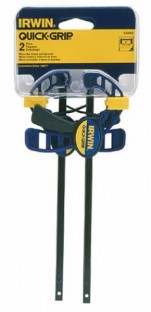
Sometimes you wish you had a third – or fourth – hand. There are a couple of tools you can get that are almost like having some extra hands around to help you out. The first one is some small spring clamps. I have some similar to these Wolfcraft Hobby Clamps that I picked up a long time ago. My only complaint with the set I have that they are a bit stronger than I’d like and they’re all exactly the same size and shape. This Wolfcraft set actually includes some different styles of clamp and looks a little more suited to what we’re doing. I’ve ordered a set and will post my thoughts on them after I’ve had a chance to work with them some.
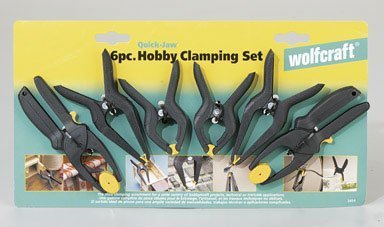
The Wolfcraft Hobby Clamp Set comes with a variety of different style clamps that will come in handy
The next item is also a clamp but it’s a larger, different style of clamp that you may need if you’re making terrain or assembling some of the larger model kits like tanks, flyers, or laser cut buildings. This is a sliding bar clamp that comes in a mini size with a maximum four inch jaw opening. It’s just the right size for a lot of larger hobby projects without being ungainly and taking up your whole desk. These are available at Amazon in a two pack but hold the phone – Harbor Freight carries these for a mere two bucks apiece and you can buy them indiviually. I’ve looked around the ‘net and I haven’t found anywhere cheaper than these. Worth a stop by your local Harbor Freight if you have one nearby.
Micro Bar Clamps – these are great for holding larger models or terrain projects together while gluing and assembling
The last “third hand” type item I’m going to recommend is a little hobby vise with a set of wide jaws. This is the PanaVise Model 201 Junior and it has a nice solid base, fine controls for adjusting the vise jaws and it tilts and pans every which-way. You can also get a couple of different attachable bases for this vise. There’s a wider base that has little parts trays around the circumference and there’s also a vacuum base version of the PanaVise Junior that’ll keep the vise from sliding around on your desk/work surface.
The PanaVise Junior Miniature Vise
The Brush Off
Last but definitely not least, you should probably pick up a couple of small brushes for clean up. These are handy for cleaning up your needle files if they get jammed up with the shavings from cleaning and smoothing model parts. I have a three piece mini wire brush set like this one. It includes a nylon, brass and steel brush. I’ll be honest with you, the steel brush is usually overkill for most hobby projects so I don’t use it much but the brass and nylon brushes have really become essential tools for cleaning other tools and miniatures.
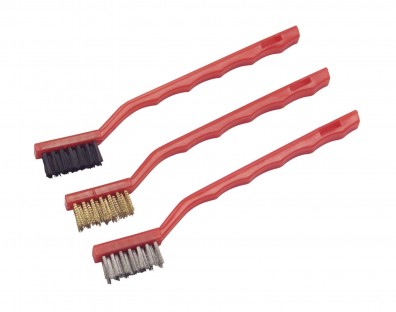
This Mini Brush Set is great for those little cleanup jobs
There are probably a few other items that I could mention but these items are among the most frequently used in my experience. I think the two key items in this list are the cutting mat and good lighting. You’ll probably want to start with those and then add the other items as you need them. As always, if you’d like to add a helpful tip or observation, feel free to do so down below in the comment section or find me on Twitter @HolyCrapItsLate. Next time we’ll take a look at the stuff that holds things all together, glue!