Something that I get asked a lot when I’m talking miniatures is what glue to use for various projects. For a lot of folks coming in to the miniatures hobby, glue is almost an afterthought, something you throw in to the pile of stuff you’re buying at checkout. For others it can be a mystery, meaning they’ve seen a bunch of different glues but aren’t sure what they should use for the miniatures or model kit they just bought. The truth is there are lots of different types of glues and they have different uses depending on what miniatures or models you’re assembling.
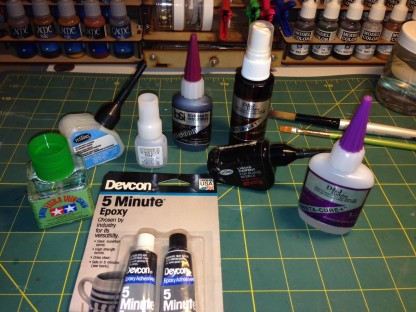
An avalanche of adhesives!
Miniature and Model Glue Basics
Not all model glues are the same, in fact there’s quite a bit of variety. There’s also variety in how these are dispensed or applied. One of the key things when choosing a glue for your project is knowing what material you’re going to be assembling. Different types of plastics and resins will require different glues. Look at the package for the item you’re assembling, some manufacturers will suggest what you need for assembly. If you’re not sure, check the manufacturers website or one of the many forums dedicated to hobby modeling and miniatures. You can also ask the resident expert at your Friendly Local Game Store, he or she will probably be happy to talk to you and answer your questions.
One of the most important rules about using glue is, “less is more”. Use glues sparingly, you want to bond parts to parts and using a thin film of glue will accomplish this. If you get too much glue on your parts you’ll end up gluing large blobs of glue to each other. This will result in a poor bond and the parts not fitting together correctly. Too much glue can also etch or warp the plastic, depending on the material and the glue you are using.
Prepare your miniatures surfaces. There are three keys to preparation: clean, test fit, and surface preparation. Most miniatures and models use a mold release agent to make getting the parts out of the molds an easier process. This release agent can be greasy or powdery. The release agent will interfere with glues and it’ll also prevent paint from sticking to the models when you get to that stage.
It’s recommended that you wash parts in warm soapy water – dish washing liquid is fine for this with plastic and metal models. For resin models you will need to use something more powerful like Simple Green or Fabuloso (I think Fabuloso is the Mexican version of Purple Power, I get it at the local Mexican market. It’s cheaper than the name brand stuff and works just as well). After washing, make sure parts are completely dry before gluing them.
You’ll want to dry fit your parts before applying glue. This just means putting the parts together without glue so that you understand how they fit together, that it’s a tight fit, and that you get an idea of where the best places are to apply glue. Lastly you’ll want to do surface prep like removing any burrs or sprue gates/mold lines that will get in the way of a tight fight or be difficult to access after the parts are glued together. (Sprue gates are the bits where the part is attached to the sprue so that the material can flow into the mold during manufacture.)
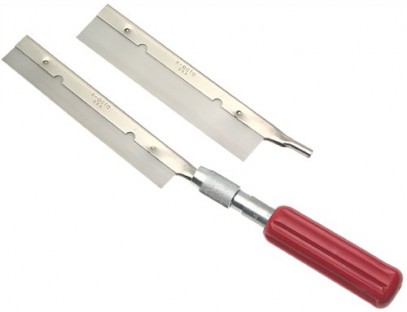
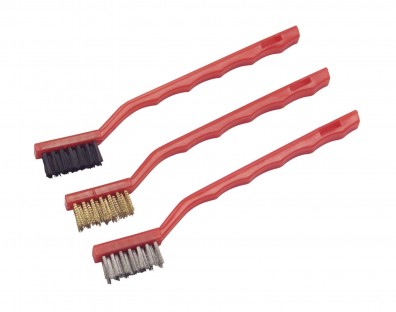
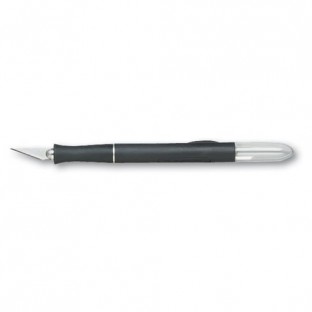
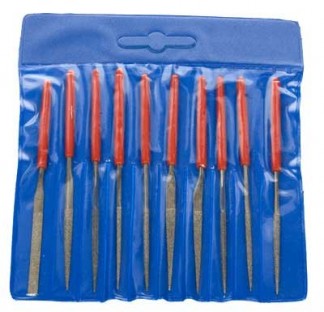
Sometimes with very smooth parts it’s a good idea to rough up the surfaces where the parts will join in order to get a better surface for the glue to bond the parts. You can do this with your needle files, small emery boards or even an X-acto knife.
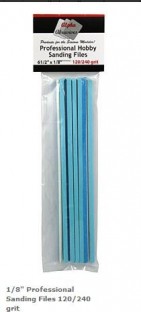
These small sanding sticks/emery boards are really handy for surface prep on miniatures and model kits
When applying glue, use a tool that gives you good control of your glue. This can be a needle applicator tip, a brush or even something as simple as a toothpick. As mentioned above you want to apply glue sparingly. Squirting it out of a tube is probably the worst way of applying glue. If tube glue is what you have, squirt a little bit onto some wax paper and then use a toothpick or cheap brush to apply it to the parts.
Types of Glue I Use
I actually have a large assortment of glues because there’s no such thing as “One Glue to Bind Them All”. I’ll go through the types of glue I use and what I use them for. As a general rule you’re going to use model cement for most plastic miniatures and model kits that are made of styrene or ABS. You’ll use Crazy Glue/Cyanoacrylates (aka CA) for resin models and some softer “bendy” plastics – this is where you’ll need to check with the manufacturer if you’re not sure. Those heavy duty large model kits may require some two part epoxy or extra thick CA. Last but not least you’ll want some PVA/Elmers White Glue for basing and scenery materials.
Crazy Glue/Cyanoacrylate (CA)
I have several different types of CA and use each one for different applications. I use a thin CA for general assembly of small resin miniatures and some small metal parts as well. I recommend you get one with a built in brush applicator. The brush gives you a lot of control and allows you to put the CA only where you need it. I recommend Games Workshops “Super Glue Thin” product. It’s easy to find and easy to use. The packaging ensures that the brush comes out of the bottle loaded with a moderate amount of glue and the GW product is widely available at game and hobby stores.
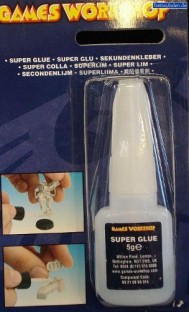
Game Workshop Super Glue Thin is widely available at hobby shops. Loctite also makes a thin superglue with a brush applicator.
I also use a thicker gap-filling CA, Bob Smith Industries Insta-Cure+ for spots where I need some extra strength or to fill a small gap. Using a thicker CA can also give you better control of the glue when you’re applying it. CA’s go from very thin all the way up to gel like consistency. You can experiment with these various thicknesses to see which you are most comfortable with. This particular product has a plastic tip that you cut open on first use so just cut the very tip of it off so you have a small opening. If the tip gets gummed up you can buy replacement bottle tops and caps. (Another use for the thicker CA’s is as a gap filler. You can run some thick or gel type CA into a gap between parts and when it sets you’ll be able to sand and finish it so that it completely hides the gap. You can use an Accelerator to speed up the curing process – more on Accelerators below)

Bob Smith Industries Insta Cure+ is my preferred CA.
For places where I really need a strong bond, for example, large kits with heavy wings or that have heavy metal add on parts I use Bob Smith Industries IC-2000. IC-2000 is a CA that has had very finely ground black rubber added to it. I have used this to secure things like dragon wings to large metal models and it is very strong. I’ve dropped stuff that is glued together with IC-2000 and the actual metal snaps off close to join but not the joined parts. This stuff is really just for specialized applications but it is handy to have around.
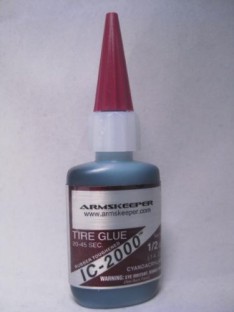
Bob Smith Industries IC-2000
The last two CA products I keep around are BSI Insta-Set Accelerator and BSI Un-Cure Debonder. The Insta-Set is an accelerator. You can use it to speed up the curing process for CA’s but be aware that a bond using accelerator will be less strong than one without. Another use for accelerator is quick curing when using CA to fill a gap. You run a bead of CA over the gap and the spray the accelerator over it to cure it immediately. Accelerator creates a chemical reaction and the by product is heat. This reaction can get VERY hot so be careful about having glue on your skin when using this product. Accelerator can also etch styrene plastic so use it sparingly.
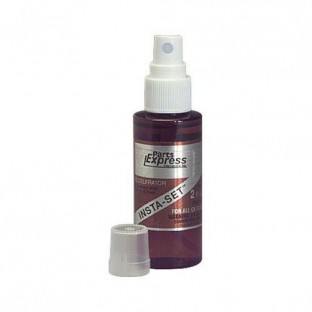
Bob Smith Industries Insta Set Accelerator
Un-Cure is a CA debonder. You can use this product to dissolve the bond between parts or remove CA from your skin. Use debonder sparingly as it can soften plastic parts.
CA Tip: The reason CA’s are so good at bonding skin is because that was their original purpose! If you apply some lotion to your hands before working with CA it may help you by making any CA you get stuck to yourself a bit easier to remove. It won’t completely prevent it from bonding to you but may make cleanup a bit easier.
Model Cement and Solvent
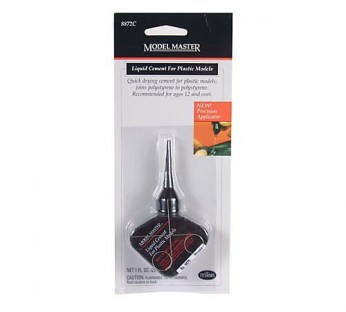
There are lots of types of model cement. My biggest issue with this is how you apply it. Because of that I have a favorite product for those just starting out. This product is Testors Model Master Liquid Cement. This product comes with a steel needle tip allowing for very precise and controlled application. This has been my go-to model cement for at least a decade, possibly longer. The tip rarely clogs because it’s steel and any dried glue just peels away. The package does include a couple of fine wire tip cleaners for the rare clog. (There’s a similar Testors product “Quick Dry Cement”. This does not have the steel tip so make sure you get the Model Masters cement.)
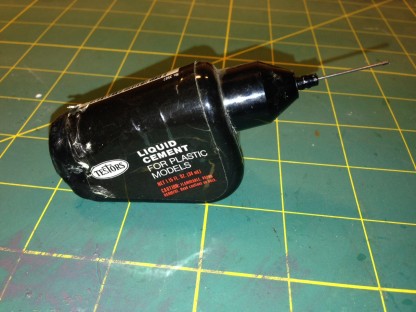
The Testors Model Masters Cement with the steel needle applicator gives you great control over the amount and placement of glue on miniature & model parts
The other Testors product I use is Model Masters Clear Parts Cement. This is formulated differently so it won’t etch or fog up clear parts like cockpit canopies or windows. Highly recommend this product as there’s nothing more aggravating that putting a ton of work into a kit and then having the windows get fogged by cement.
Model Masters Cement – this one’s got the steel needle applicator tip
The last type of model cement I use is more of a solvent. It’s very thin and has a brush applicator. I typically lay the brush at the join and allow the glue to wick it’s way in between the parts. This glue actually melts the plastic a bit so that the parts fuse together. I love this stuff because it enables me to get a really good join and a tight fit on parts that have been correctly prepped. I have been using Tamiya Extra Thin and I really recommend this particular product.
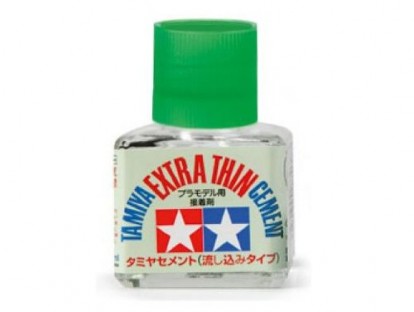
Tamiya Extra Thin Cement
Model cements and solvents should be used sparingly as they can warp, soften or etch plastic. Quick tip: the thin cements and solvents are volatile and will evaporate quickly. Use with good ventilation and keep the lid on tight. If you forget to put the lid on you may return to a mostly empty bottle the next day!
2-Part Epoxy
I occasionally use a 2-part epoxy like Devcon or JB Weld. Just be aware of the short working time – I use a five minute epoxy and make sure you mix this thoroughly. I don’t recommend using anything with a quicker setting time than five minutes as you’ll invariably run up against the clock and that can be frustrating. Also, look at the package and see what you need for cleaning this up BEFORE you start mixing. You’ll want to be ready for clean up immediately upon finishing with this product.
PVA aka Elmers Glue
PVA is Polyvinyl Acetate, commonly known as Elmer’s Glue. You’ll want some of this for basing. Thin it slightly with water and apply it to your base with a brush, then add your basing material to the base. Once your basing material has dried completely you can paint a thinned coat of PVA over it to seal it on to the base. Some good alternatives to Elmers are Weldbond and Aleene’s Tacky Glue. Aleene’s can be particularly useful on bases with a slick surface. (Don’t forget that for slick surfaced bases you can also rough them up a bit before applying glue to help give the glue something to bond with).
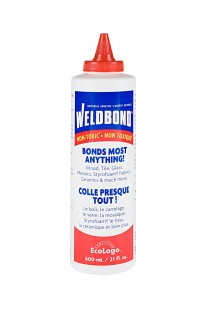
Weldbond Glue – I keep this around because I use it a lot for large terrain projects as well
Before we wrap up I want to mention that I have not talked about pinning models in this post at all because that is another lengthy subject that should have it’s own article. I’ll be putting together a guide for pinning models in the near future but in the meantime you can check this article for some thorough information on what you’ll need to have when we talk about pinning models.
As always, the way I talk about doing things and what I use is based on a my own history of building models and miniatures. These are the products I use and the ways I do things but they are by no means the only way of doing things. If you’d like to contribute an idea or an opinion of a product that you like, feel free to do so in the comments section below. Constructive dialog is always welcome here!