In the last couple of articles we’ve looked at airbrushes and airbrush compressors. Today we’ll continue with that theme by exploring all of the extra stuff that you may need as you begin to airbrush. In terms of price per item the airbrush and compressor are likely the two most expensive parts of the process. However there are quite a few other things that you’re going to want to pick up as well. Most of these are fairly inexpensive. Some of these items are optional and you can either pass on them completely or pick them up at a later date. There are a few things though that are pretty much mandatory due to safety or environmental concerns. Even though we’re talking about spraying water based acrylics through your airbrush you’ll still want to take care of yourself and your surroundings.
In this article we’ll tall about all of the odds and ends that I use when airbrushing, why I use them or find them useful and finally, whether I feel they are must haves or optional buys.
I’ve got an Airbrush & Compressor so I’m Ready to Start, Right?
If you’ve picked up an airbrush and compressor or other air source you’re probably thinking you’re all set. Well, not quite. There are a few other items you’re going to want to pick up or at least consider. Fortunately, if you’ve spent carefully on the two big items you’ve probably got some room left in the budget to pick some of these things up.
Airbrushing Is Still Spraying Paint, That Means Safety First
First off lets talk about your airspace. What I mean by that is the air that you’re breathing. When you spray paint you’re going to breathe in atomized paint particles unless you take some precautions to minimize your exposure. I know, you’re probably thinking “wait, hobby acrylics are water based paint, how bad can that be?” What you need to be aware of is that some of the materials in paint, like cadmium used in yellow paints is bad for you if you ingest it. I’m not a doctor so I don’t know what the threshold is for breathing something in like cadmium but why risk it? Cadmium and other ingredients in paint can cause organ failure if you get enough exposure. If you’re already sensitive to things or have other issues (or an issue you might be unaware of) you really should take some steps to mitigate your exposure. If you don’t believe me about how much paint you can ingest in an airbrushing session. Blow your nose after you’ve painted something green or black without a mask and see what that looks like. You’ll probably be surprised by how much paint you can actually suck up when you airbrush.
There are two main ways to deal with this. If you’re painting in the garage then you can probably get by with just a mask. If you’re painting in the house, you’ll want to use a mask and some sort of spray booth. You can make a spray booth, check out Google or YouTube and you’ll find some articles or videos there on kludging together a spray booth as a DIY project. If you prefer a ready made solution you can get a portable spray booth, probably from the same place you bought your airbrush and compressor.
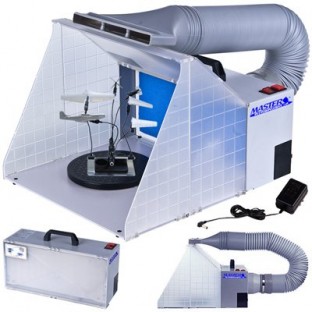
This portable airbrush spray booth will keep your airbrushing environment clean
I use the Master Airbrush Portable Spray Booth. These things used to be ridiculously expensive but have come way down in price over the last few years. Retail is $169 but you can pick this up online for around $80. This is offered in a couple of different packages. You’ll want the one that includes the extra hardware for the exhaust. This comes with a semi-rigid flex hose and a spout that is narrow so that you can wedge it in a slightly open window allowing you to vent the air outside. The plastic outlet actually has a raised ridge around it so that you can close the window on it and it stays in place requiring only a narrowly open gap. (It’s pretty mild weather where I live so having a little gap in the window is no big deal. If you’re in colder or warmer climes you’ll probably want to seal that gap.)
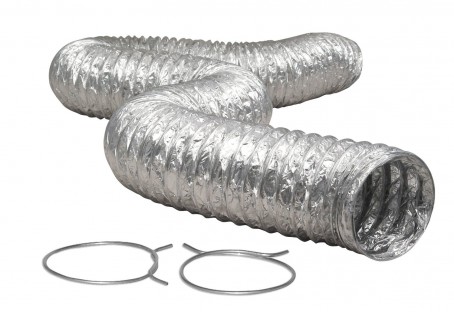
This type of dryer vent hose is much more flexible than what’s included with the spray booth
One caveat: the flex hose was a little too rigid for me because of where I needed to position the spray booth relative to the window. I solved this by not using the included flex hose and picking up a 4” diameter dryer vent flex hose at Home Depot. The dryer hose was much more flexible, allowing me to route the exhaust where I needed it easily. One other note, this spray booth is rated for non-flammable materials. Don’t use it with lacquer or enamel paints because the fan isn’t spark proof . You’ll need to explore other more expensive options if you plan to spray anything combustible. I would rate the portable spray booth as a “must have” if you’re working inside your house. Optional if you’re in the garage.
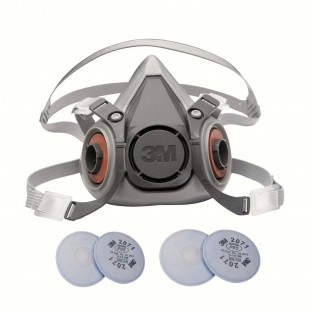
The 3M 6000 Respirator Half Mask is a good choice when using an airbrush
The other safety item is a mask/respirator. Get a good one because it’s your health we’re talking about. In a pinch you can use a disposable paper one and that’s better than nothing but you’re much better off investing in a good mask. I’m recommending the 3M 6000 series half mask. This is a half mask so it only covers your nose & mouth and won’t get in the way of your glasses. It includes filters that are good for sanding/grinding/acrylic painting and you can upgrade it to use filter cartridges if you’re working with harsher chemicals like lacquer or enamel paints. I’m rating the mask as a must have accessory because health is important and I want you to be around awhile to enjoy your hobbying!
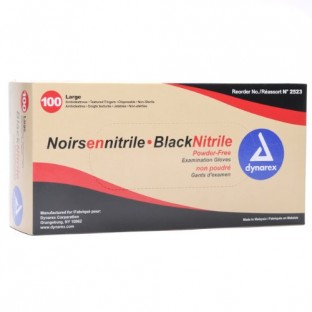
Disposable gloves will help keep airbrush overspray off of your hands when holding small models or parts
The next thing on our list is optional, depending on how much you care about getting paint on your hands. I find it handy to keep a box of latex (or nitrile if you’re allergic to latex) disposable gloves in my paint area. I don’t use these for brush painting but I definitely do use them when I’m airbrushing, at least on the hand I’m holding miniatures or models with. Semi-optional but recommended.
Last but not least for environment accessories is something that a lot of people overlook and that’s good lighting. You probably have good lighting on your paint desk where you brush paint. You should have good lighting where you airbrush as well. Either get another light or if you have a light with one of those table clamps that it sockets into, just pick up an extra table clamp and you can move your light around without having to get under your desk to undo the clamp all the time. Good lighting in your work space is a must have!
I have posted other articles about proper desk lamps and daylight bulbs for hobbying and you can check those out if you’d like a little more information on those subjects.
Airbrush Care and Maintenance Accessories
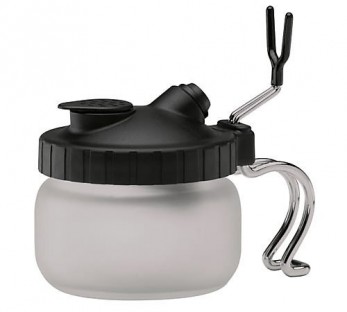
The Iwata Airbrush Cleaning Station is a must have and includes a built in airbrush stand
In this section we’ll look at items that you’ll want to have to take care of your airbrush and work area. There are several items that I find really helpful to have on hand. One of my favorites is an airbrush cleaning station. This is a basically a jar that your airbrush nozzle sockets into and it allows you to empty out paint, cleaning fluid and water rapidly when you’re doing a color change during an airbrushing session. The jar has a little filter that allows air out but keeps moisture and particulates in. When the jar is full you just remove the lid and dump it. You can probably find a video on YouTube telling you how to build one of these if you want to make it a DIY project or you can buy one. I have the Iwata Airbrush Cleaning Station and I like it because it actually has a built in airbrush holder as part of the handle. You can pick this item up for around $20 online usually. Optional but so handy I really recommend it.
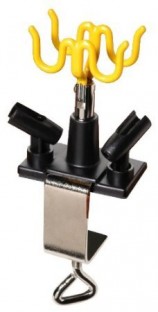
This airbrush stand will hold four airbrushes and clamps on to your desk
Airbrush stands come in single double and quad configurations. Handy to have but not required. Definitely consider getting one if you airbrush a lot and have more than one airbrush.
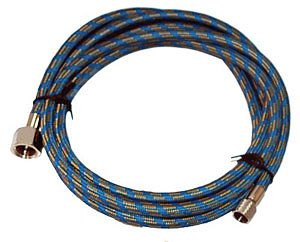
This 10 foot long braided airbrush hose will give you plenty of room to work and should last just about forever
One thing I really recommend is a 10′ long braided airbrush hose. Don’t use the thin vinyl ones that come with some airbrush packages. The hose will kink and/or crack eventually. I’m also not a fan of the plastic coil up hoses. They always seem to be in the way and I feel like I’m fighting against my hose all the time. If you purchased one of the Master Airbrush Compressors I mentioned in my previous article it probably came with a 6 foot braided hose and that may be adequate for you so try it out first. Since I keep my compressor on the floor I like having the longer hose. Recommended but optional.
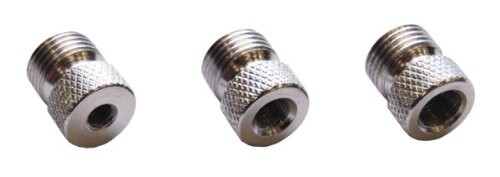
This handy airbrush adapter set covers all of the most common airbrushes
If you’re using a braided hose chances are it’s a standard Iwata hose unless it states otherwise. One thing that’s frustrating about airbrushes is that every manufacturer seems to use a different sized threaded fitting for their air connections. You’ll need to make sure you have the correct adapter to mate your airbrush to your air hose or quick disconnect. If you’re not sure, here’s a handy three pack of the most popular adapters. Recommended depending on your airbrush and hoses.
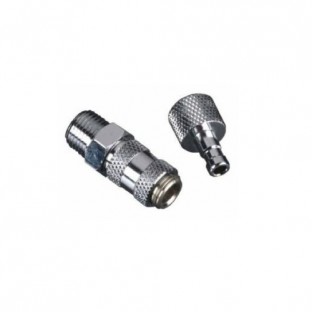
Airbrush quick disconnects are a very handy accessory but avoid the cheap/generic ones as they tend to leak
An item that I really like is airbrush quick disconnects. These don’t typically come with your airbrush but are a really excellent add-on. They allow you to swap out airbrushes almost instantly by use of a snap together chuck as opposed to having to unscrew everything. I have one of these attached to each end of my airbrush hose and a quick disconnect fitting at the compressor and on each airbrush I use. If you decide to go this route, I really recommend you spend a little extra and get the Iwata branded ones. I originally went with generic ones sold by TCP Global and I had rotten luck with those. After trying several of them I switched to Iwata because every one of the cheap ones leaked air like a sieve. Strictly optional but very handy. If you go with quick disconnects spend a little extra and get good ones.
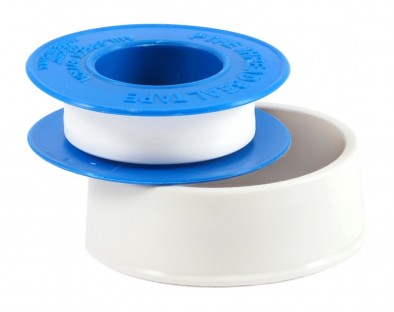
Teflon pipe thread tape – pick a roll of this up at the local hardware store
You may have received a roll of Teflon tape with your air compressor. If you didn’t, pick one up at a hardware store for about two bucks. Use this on anything that’s threaded, like where your regulator connects to your compressor or your quick disconnect connects to your regulator, etc. Basically any place there’s an adapter or fitting needs a bit of of this to ensure it doesn’t leak. Recommended
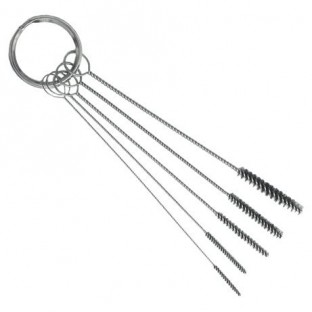
These tiny brushes will be useful when you break down your airbrush for a thorough cleaning
Pick up a set of airbrush cleaning brushes. This will make the process of giving your airbrush a thorough cleaning much easier. You’ll be using these when you do a total breakdown of your airbrush to clean it at the end of your painting sessions. Recommended. Look for a detailed how-to about airbrush breakdown and cleaning in a future article.

You probably have these around the house, keep a roll handy at your airbrushing work area
Paper towels. Yep, it probably sounds dumb to tell you this but you’re going to want to have a roll handy because you will spill stuff at the worst possible time and need them “right now”. If you’re not spilling stuff, you’re not really airbrushing.

Keep an extra airbrush needle around, so you’ll have it in an emergency
No matter how careful you are, eventually you’re going to bend or damage your airbrush needle. Buy an extra airbrush needle now because you’re going to do this right in the middle of a big project when you can’t afford to wait a few days to get one in via the mail. Murphy’s law also assures you that your local hobby shop will be out of the exact airbrush needle you desperately need in an emergency. All kidding aside, get a spare. Highly recommended.
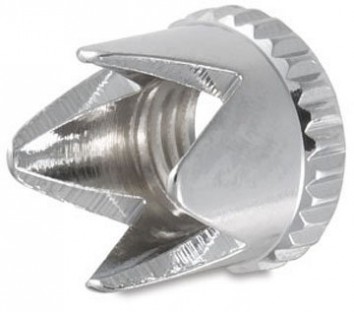
An example of an airbrush crown cap – get the one for your airbrush if it didn’t come with one
If your airbrush didn’t come with one, pick up a crown cap. Your airbrush nozzle probably comes with a nozzle cap that looks like a nose cone on a rocket with the tip shaved off. When you get in really close to do fine detail that cap restricts airflow and actually creates a bit of turbulence at the tip that can make your fine lines fuzzier than you want them to be. A crown cap has cutaway areas at the nozzle to reduce most of this turbulence but still has protrusions to protect the needle. Some experienced airbrush users will paint without the nozzle cap but I don’t recommend that, it’s a good way to damage the tip of your airbrush needle. Recommended
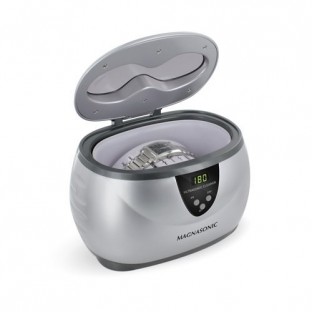
This small ultrasonic cleaner is great at removing bits of stuck on dried paint from your airbrush
An ultrasonic cleaner is strictly optional but handy to have around when you do a thorough breakdown and cleaning of your airbrush. These used to be outrageously expensive but you can now find them everywhere online in the $40 to $60 range. You fill them with water and dunk your airbrush parts for a few minutes and they’ll basically vibrate all the stuck on bits of paint and junk off of your airbrush. Usually one 5 to 10 minute bath cycle does the trick. More if you’ve been a slacker and not cleaned your airbrush or let paint dry in it. Also, you can get this past your non hobbying significant other by telling them they can use it to clean jewelry too. Optional
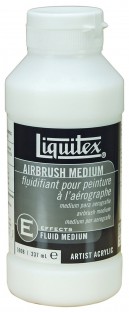
Liquitex airbrush thinner works well with a variety of acrylic paints
If you’re using an airbrush paint or a hobby paint, pick up the same brand airbrush thinner if available. Golden or Liquitex Airbrush Medium is also a good choice. Otherwise you’re going to have to do some experimenting to find a suitable thinner. Almost all paint will need to be thinned to be shot through an airbrush. Even some of the paints marketed as airbrush ready may need a little more thinning to really flow well. In a pinch you can use water or alcohol but I’d experiment with that a bit first. I’ll put up another article in the near future about thinning paints for use in an airbrush.
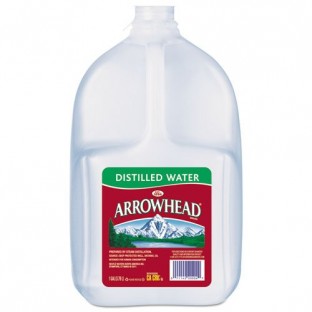
Plain old distilled water. Available at the grocery store for about $2 a gallon
Get a gallon of distilled water at the grocery store. Always run a little of this through your airbrush after changing colors or running airbrush cleaner through it. Two bucks at the grocery store. Highly recommended
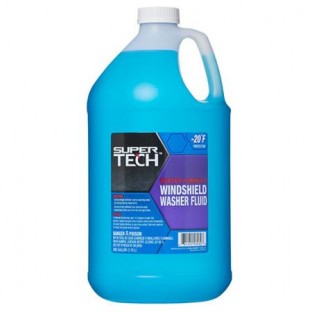
Windshield washer fluid, available at your local Wal Mart or auto parts. Get the cheap stuff and use it as airbrush cleaner.
You can buy expensive airbrush cleaners to run through your airbrush between paints and after painting sessions. Do this instead: Pick up a gallon of cheapo windshield washer fluid at your local Wal Mart or auto parts. Get the cheap blue stuff that’s around two bucks a gallon. Don’t get the expensive stuff. This is mostly colored water with a bit of methanol and possibly some detergent mixed in. It does a great job of cleaning your airbrush and is dirt cheap. A gallon will last you a long time. Never leave this or any other cleaner in your airbrush, always run clean water though your airbrush after running any sort of cleaner through it.
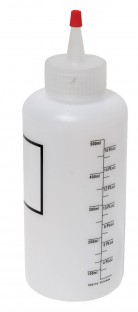
Plastic squeeze bottles are great for keeping your distilled water, cleaner and other fluids handy
You’re going to want a few plastic squeeze bottles to make your life easier. I recommended one for distilled water and another for windshield washer/cleaning fluid as you won’t want to be handling one gallon bottles of that stuff while you’re airbrushing. Pick up a couple of these liter or half liter sized squeeze bottles with caps and keep those filled up with your cleaning fluids at your work area. Don’t forget to get a small funnel to make transferring from the big bottles to the small bottles a snap. Very handy and of course optional but recommended.
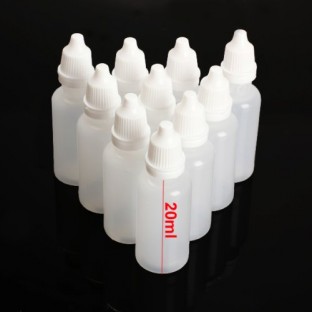
These small plastic dropper bottles are great for custom paint mixes or transferring paint from pots
If you’re mixing your own colors or transferring paint from a large container to a smaller more convenient container get some of these dropper bottles. These are super cheap, around $15 for 50 of them shipped via Amazon and they are really handy to have around.
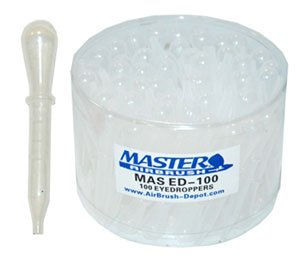
Plastic pipettes work great for transferring paint between paint pots and your airbrush
Also consider picking up some of these plastic pipettes if you’re using paint that isn’t packaged in dropper bottles. Trying to pour paint from a paint pot into an airbrush color cup is a sure way to make a mess and waste a lot of paint. Highly recommended if you’re using paint from non dropper bottles.
There’s a few other items that are handy to have around but you probably have these around the house or your hobby work area already. Keep an old brush around if you’re mixing colors and thinner in the airbrush paint cup. Also keep a pen and pad handy so you can make notes about custom color mixes and thinning paints as different paint colors in the same line of paints will have different thinning requirements.
Airbrush, Compressor and Accessories, Now It’s a Party!
At this point, you should be pretty set to start airbrushing, all that remains is for you to dive in and just do it. In upcoming articles I’ll revisit this subject to talk about thinning paints for use in an airbrush and how to clean and maintain your airbrush. I’ve added links below to the previous two articles in this series and in the future I’ll come back here and add links to any new articles that are related to this content to make it easier to find everything. If you have questions, feel free to contact me here or to find me over on Twitter @HolyCrapItsLate.
Part 1 – Airbrushing for the Miniatures Hobby – Airbrush Basics & Mini Reviews
Part 2 – Airbrushing for the Miniatures Hobby – Airbrush Compressors & Hardware
As always, your constructive comments and suggestions are welcome. Feel free to leave them in the comment section below.